Welcome!
This tutorial will help you further refine the ”Order Pizza” service by updating the PizzaTypeIntent with entities.
What you’ll learn:
- Extend intent model
- Define slot types
- Add system entities
- Create custom entities
Voice assistants and humans understand text in different ways. Entities help voice assistants understand text and extract important elements from it. An entity represents a word or phrase inside the user utterance that you want extracted. There are two types: custom and built-in entities.
We’ll start by introducing a built-in, number entity to PizzaTypeIntent.
Add a built-in entity
There’s a number of different convo-core entities available to you in the Convoworks intent model. You can find the full list here: Entities.
In this section, we’re going to use the convo-core.number entity to catch how many pizzas the user wants. To do that, we need to add the number entity to the PizzaTypeIntent.
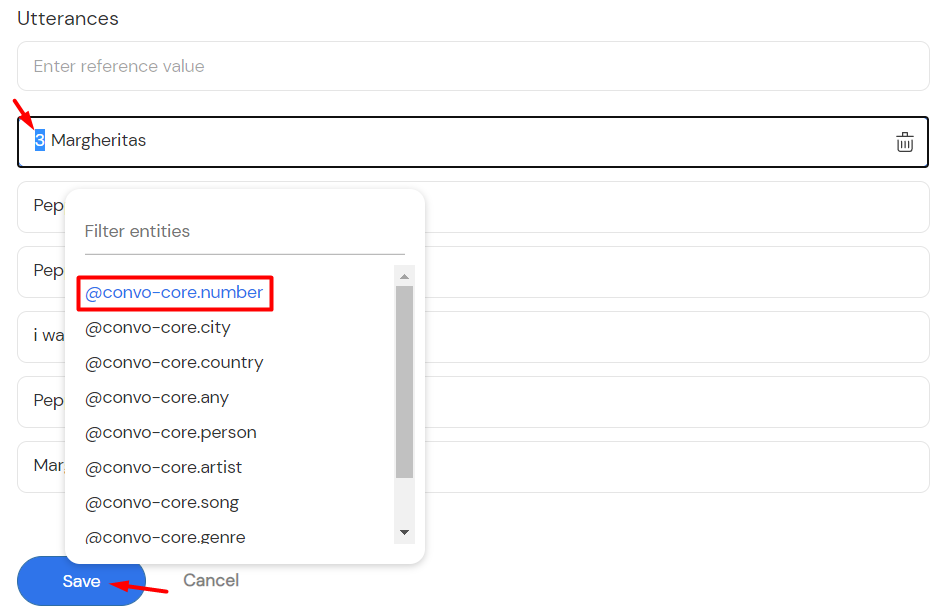
Select the Intent model menu item in the ”Order Pizza” service. Now click the PizzaTypeIntent to edit it. Add ‘’3 Margheritas’’ to the Utterances field and hit the enter key. Highlight the number 3 in the new utterance and select convo-core.number from the list. Change the parameter name in the PARAMETER NAME field to ‘’number’’.
Save the changes.
Parameter name is a variable in which the matched value of the entity is stored. We’re going to use it in the Editor to output information that we extracted.
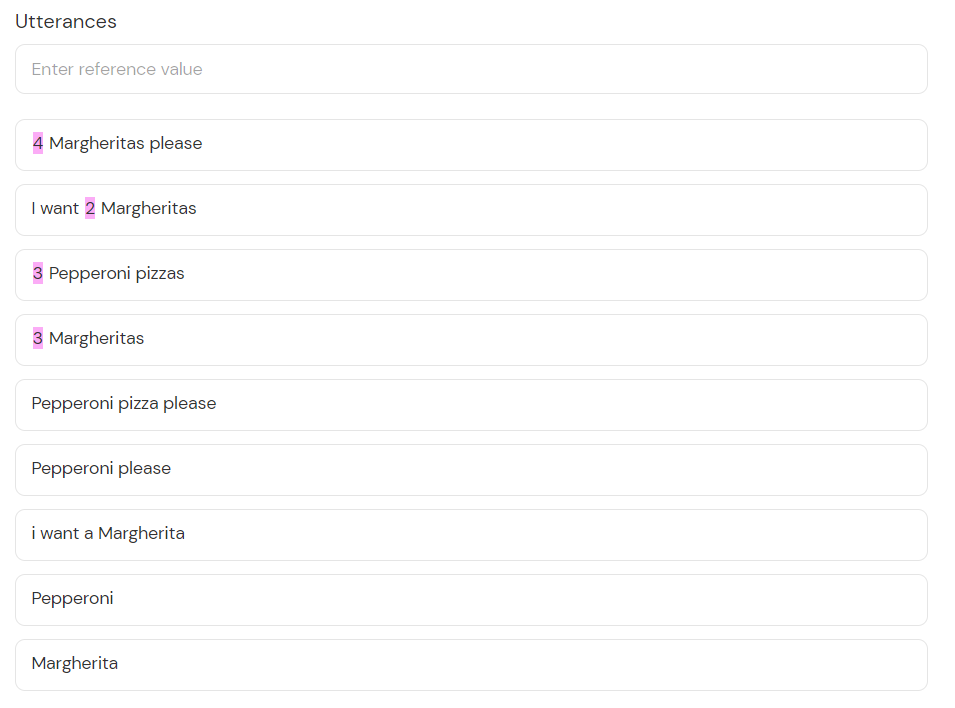
Try adding a couple of new utterances by yourself. You can add ‘’3 Pepperoni pizzas’’, ‘’I want 2 Margheritas’’ and ‘’4 Margheritas please’’ or any variations you can think of. Here’s the result with the three new utterances:
Remember to save the changes once you’re done.
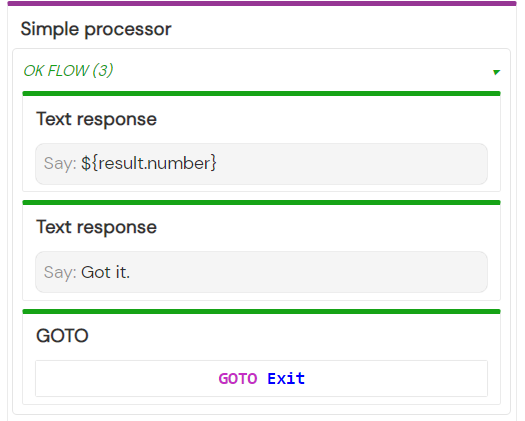
Now, go back to the Editor and open the OK flow of the PIzzaTypeIntent’s processor. Place the new Text response element at the top and add this expression: ${result.number}. You can delete it after testing.
Any parameter value can be accessed by result.parameterName or result[‘parameterName’] syntax. The value is null by default if the parameter slot isn’t filled.
Save the changes and switch to the Test page. Choose the NLP delegate and in the chatbox enter the “3 Pepperoni pizzas” text to see the result.
In the next section, we’ll add more utterances and create a new entity to make the service even more accurate in recognizing user text.
Create a custom entity
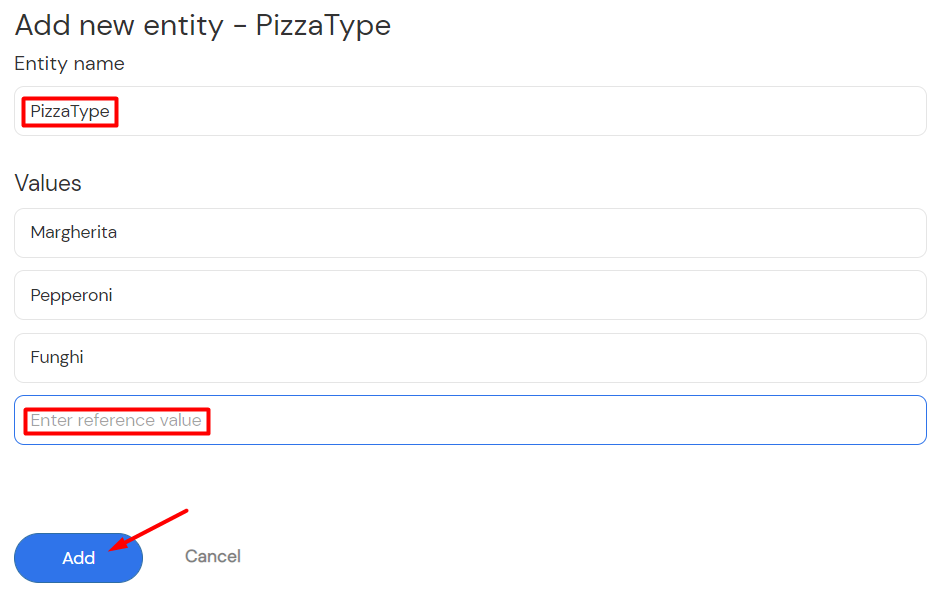
Open the Intent model page and click the Add entity button on the right. We’re going to define pizza types. Enter ‘’PizzaType’’ in the name field and add the entity. Now click on the entity name to open the editor. Enter values: ‘’Margherita’’, ‘’Pepperoni’’, ‘’Funghi’’. Press enter to add a value. Click the blue Add button once you’re done.
Now click the PizzaTypeIntent back on the Intent Model page. Add this utterance: ‘’I want a Funghi pizza’’. Press enter and highlight ‘’Funghi’’ in the utterance then select @PizzaType from the list.
Change the Parameter Name to ‘’type’’ and save the changes. Mark all pizzas in previously added utterances as @PizzaType as well. Make sure the Parameter Name is ‘’type’’ for all of them.
Let’s go back to the Editor and refine the service text a bit. Open the Read Phase of the Pizza Menu block and change the menu text to include the newly added ‘’Funghi’’ pizza. Update the Help processor’s OK flow text as well.
Now, open the OK flow of the PizzaTypeintent processor. Place the IF element at the top. Click on the element and fill in the TEST field on the right with this expression: ${result.number === null}. We’re going to assume that if the user hasn’t mentioned the number, they want only one pizza. Add this text to the then container: ‘’One ${result.type}’’.Then, add these expressions to the else container: ${result.number} ${result.type}.
Test in the chatbox with and without a number to make sure everything is working correctly. If you think some phrases are missing from the Utterances, and are triggering the Fallback intent, feel free to add them and fine-tune the PizzaTypeIntent even further.
And that’s it. You’ve arrived at the end of your ”Order Pizza” app journey. Congratulations!
In the next chapter, we’ll go through the process of publishing a service.


