To publish your service successfully, you must have a fully tested and functional service and, you have to fill out the information necessary for publication on the platform’s web page.
The required information varies depending on the platform, but the requirements are pretty similar. We’re going to go through some of them in the upcoming sections.
This tutorial is going to use the process of publishing to Amazon Alexa Skills Store as an example.
Preparing the service
Here are some tips on how to best prepare your service:
- Make sure your skill is thoroughly tested and has functional Help and Stop intents. There should be a help option in every stage of your skill. The user must be able to say “help” and receive tips on how to proceed.
- You cannot have a one-word invocation name unless you’ve trademarked that word.
- Do not use misleading or untrue information within your skill name, or invocation name.
You can read about all the content guidelines here: Policy Testing.
Distribution information

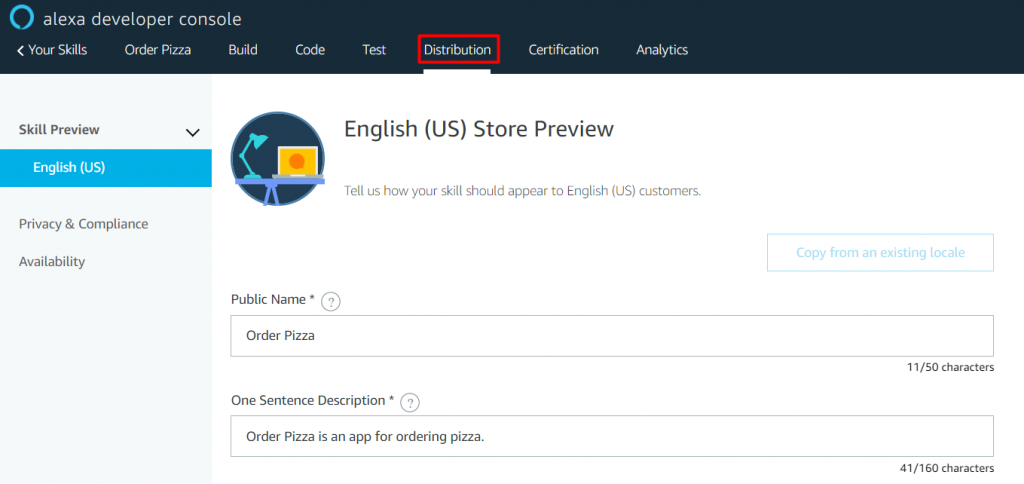
In order to get your skill published, you need to fill out the form on the Distribution page in the Alexa Developer Console. You can fill in most of the data directly via your service’s Convoworks Configuration page and propagate the data to the Developer Console. This is only possible if you have AUTO mode enabled in the platform’s configuration settings.
Steps to edit Skill Store Preview for supported locales:
- Public name* – display name of the skill, when you create a new service, this field is pre-filled with the name of the service
- One sentence description* – short description of the skill, when you create a new service, this field is pre-filled with a placeholder name of the service
- Detailed description* – more details about your skill, when you create a new service, this field is pre-filled with a placeholder name of the service
- What’s new – describe your latest features – if this is an update
- Example Phrases * – make sure example phrases containing intent request are listed verbatim in your intent’s utterances. Otherwise, your skill won’t pass the certification process
- Small Skill Icon* – it has to be a 108×108 png, if the image is not provided, the default placeholder will be used
- Large Skill Icon* – it has to be a 512×512 png, if an image is not provided, the default will be used
- Category – select a category, when selecting a child-related category, the answer to the question ‘Is this skill directed to or does it target children under the age of 13?’ has to be set to yes
- Keywords – keywords under which your skill will be displayed in the Alexa skill store
- Privacy Policy URL and Terms of Use URL are NOT optional if your skill:
Here are some tips for filling in the data:
- Fill out the mandatory* fields on the Store Preview description
- One sentence description is limited to 160 characters, so you’ll have to be brief, but informative. In the full description, except trying to explain to users why they should enable your skill, you could also list your skill’s functionality and give examples of what users can say
- Provide example phrases to help users fully understand your skill’s capability
- The Keywords section is optional, but useful if you want your skill to be found in the skill marketplace
- When you upload a small (108 x 108 px) and a large image (512 x 512 px), make sure they are NOT copyrighted
If your skill doesn’t allow for purchases, doesn’t have any login or personal information, and isn’t directed towards children or doesn’t contain advertising, you can answer ‘no’. to all questions concerning the Privacy & Compliance section.
Fill out the Privacy & Compliance questionnaire and provide the Testing Instructions for the certification team. Testing Instructions are there to let the team know if there are any specific details they need to follow to fully test the skill, or if there are any specific requirements regarding functionality such as account linking. For skills with no special requirements, you can leave the field empty.
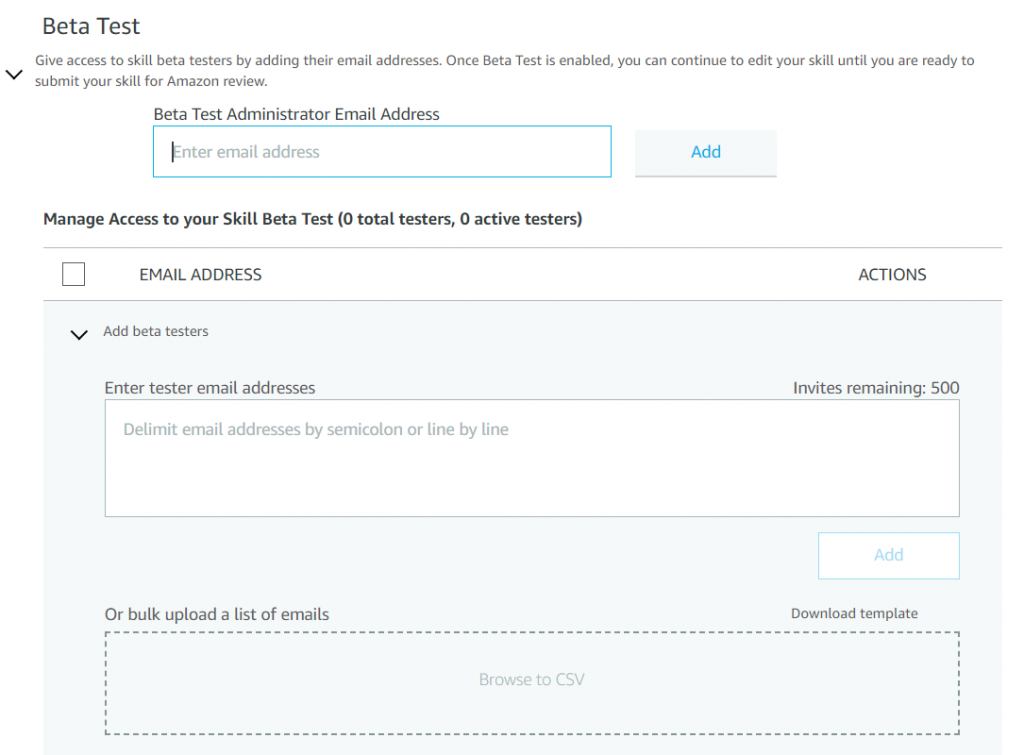
In the Availability section in the Alexa Developer Console, you define any restrictions for the availability of your skill. You can grant access to individuals to beta test your skill. And finally, you determine in which countries and regions you would like to publish your skill.
Save your data by clicking on the Save and continue button.
We’ll handle submitting the service for publishing in the next chapter.


