


Use Amazon S3 and Have no Limits with your WordPress based Alexa Audio Player
Many hosting providers have limits to their storage capacity and traffic bandwidth. In case you have a very popular podcasting website and millions of users tune in to your podcasts on your site, chances are big that your site could be very unresponsive or you could fill up that storage very quickly. So, in order to tackle that issue, a very smart move is to use a WordPress plugin which moves your uploaded media library to a cloud storage such as Google Cloud or Amazon S3. That plugin is WP Offload Media Lite.
Install WP Offload Media Lite
To install the plugin just go to [Plugins] -> [Add New] -> [type: WP Offload Media Lite] and activate the plugin. After the activation, you’ll be able to configure a Provider.
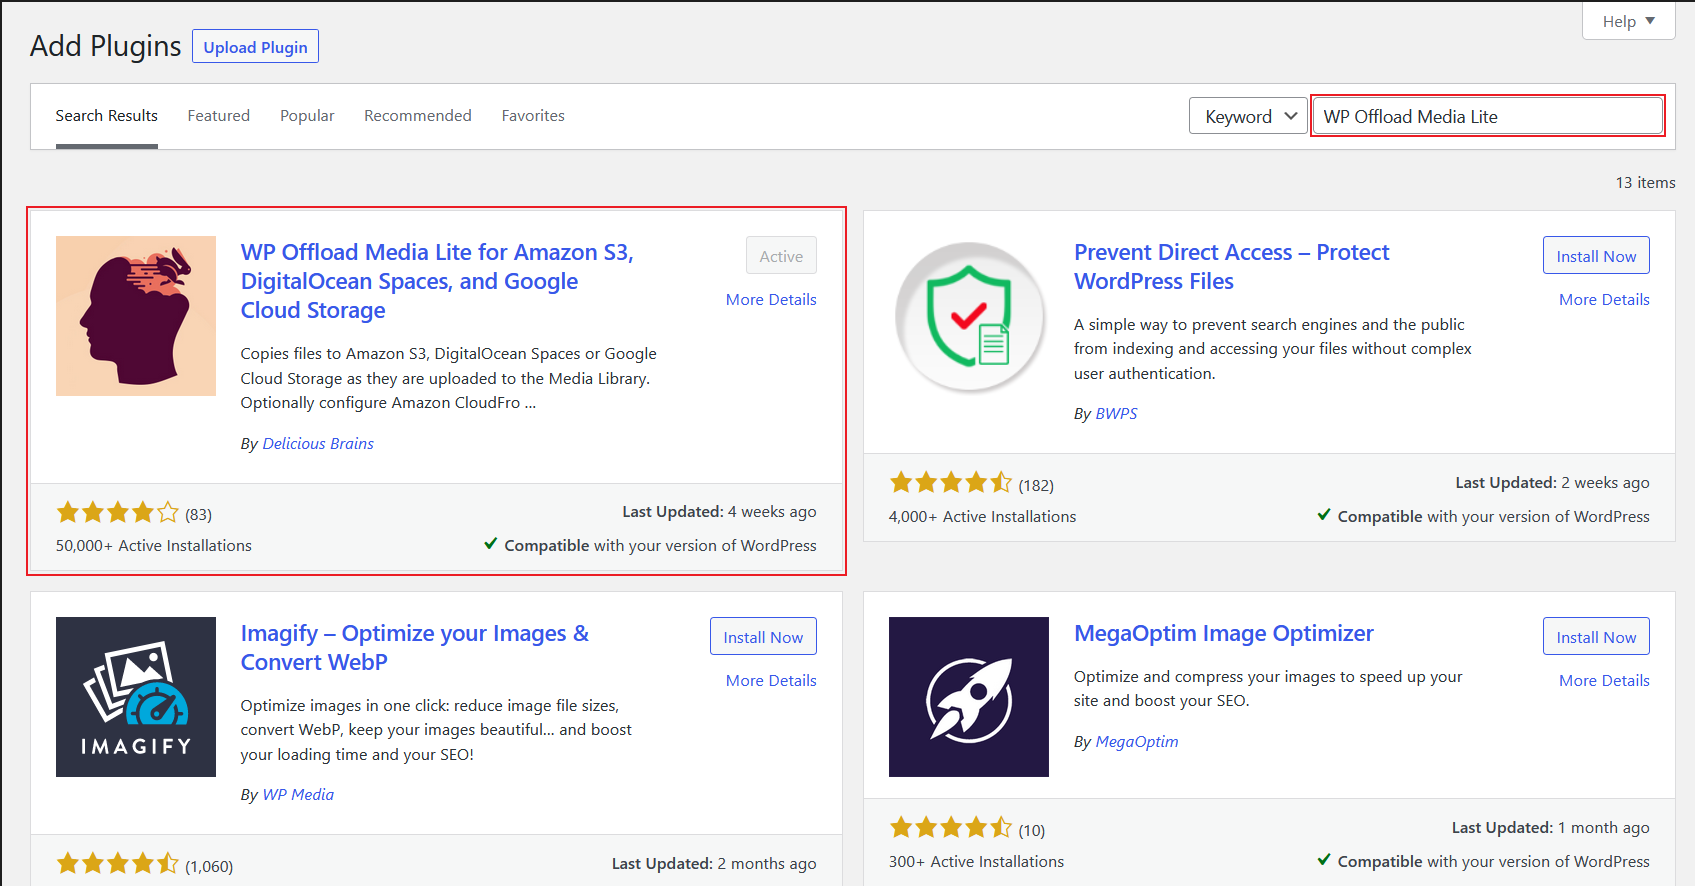
That’s it for the installation. Lets go to Connect WP Offload Media Lite with Amazon S3.
Connect WP Offload Media Lite with Amazon S3
To connect your Offload Media Lite plugin with Amazon S3, we need to create an IAM User and then either select an Existing S3 Bucket or create an via the same plugin. So, let’s start by creating an IAM User on AWS.
Create an IAM User
In order to offload your media to an S3 bucket, you’ll need to obtain IAM User access-key-id and secret-access-key, by going trough the following steps:
- Login to your AWS Account here. If you don’t have an account, just create one here.
- Create an IAM User
- Once you have logged in to the console, you will need to create a new IAM user:
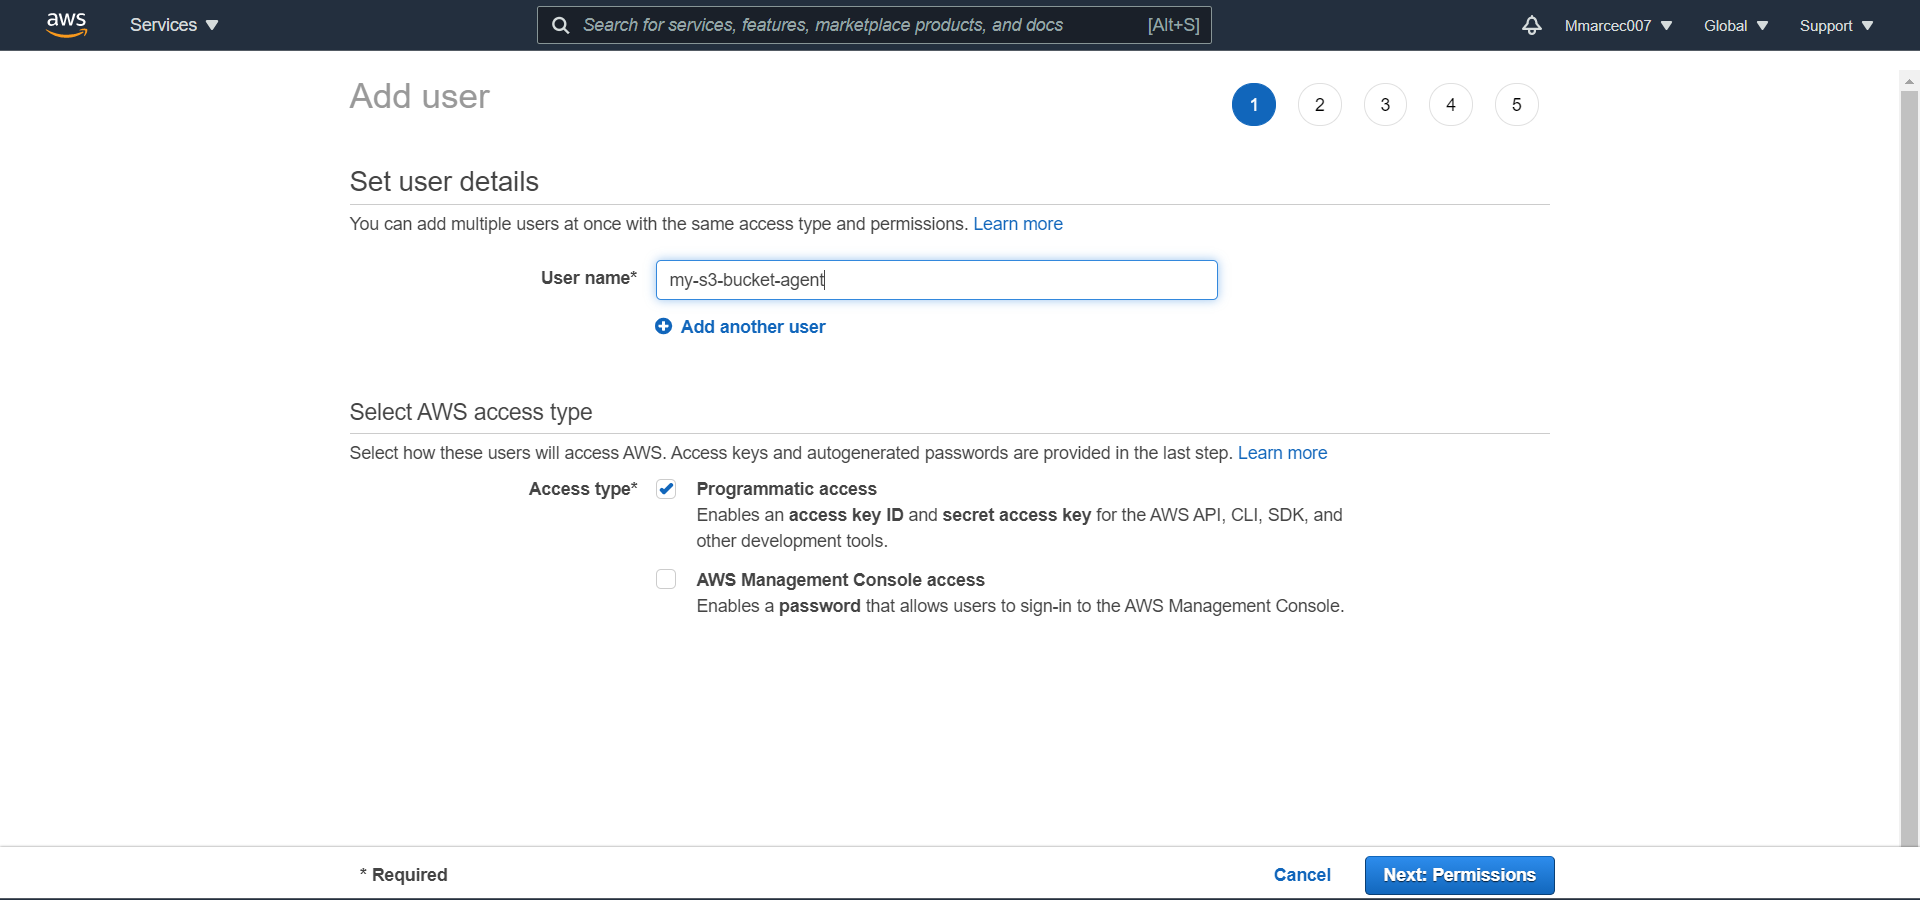
- Navigate to the IAM Users page in the AWS Console and click the [Add user button].
- Enter a name for the user in the User name field.
-
Under Access type select the checkbox for Programmatic access, then click the [Next: Permissions] button.
-
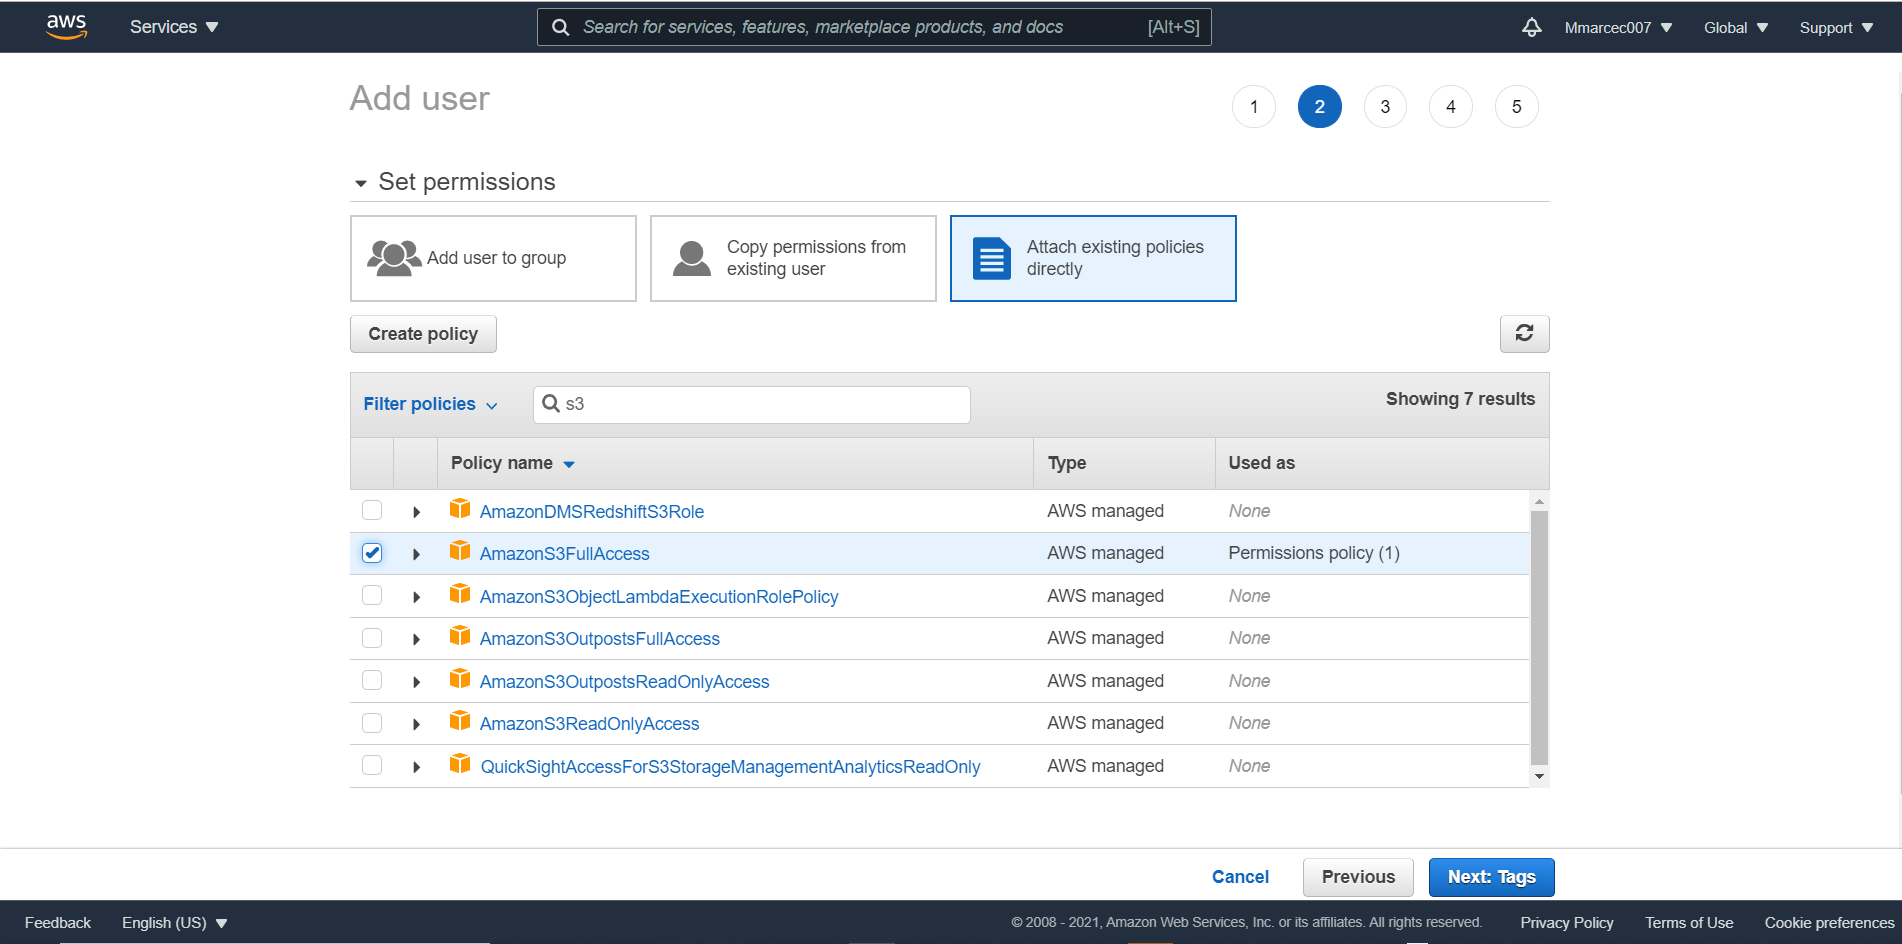
To allow the new user to manage buckets and objects in the S3 service, you need to grant it specific permissions. Click the [Attach existing policies directly] button, and then enter “s3” in the filter policies input box. Select the “AmazonS3FullAccess” policy, then click the [Next: Tags] button at the bottom of the page.
-
You can add some Tags if you wish, but we will skip this step and proceed to Review.

-
If you are satisfied with the User details, just hit the Create user button.
-
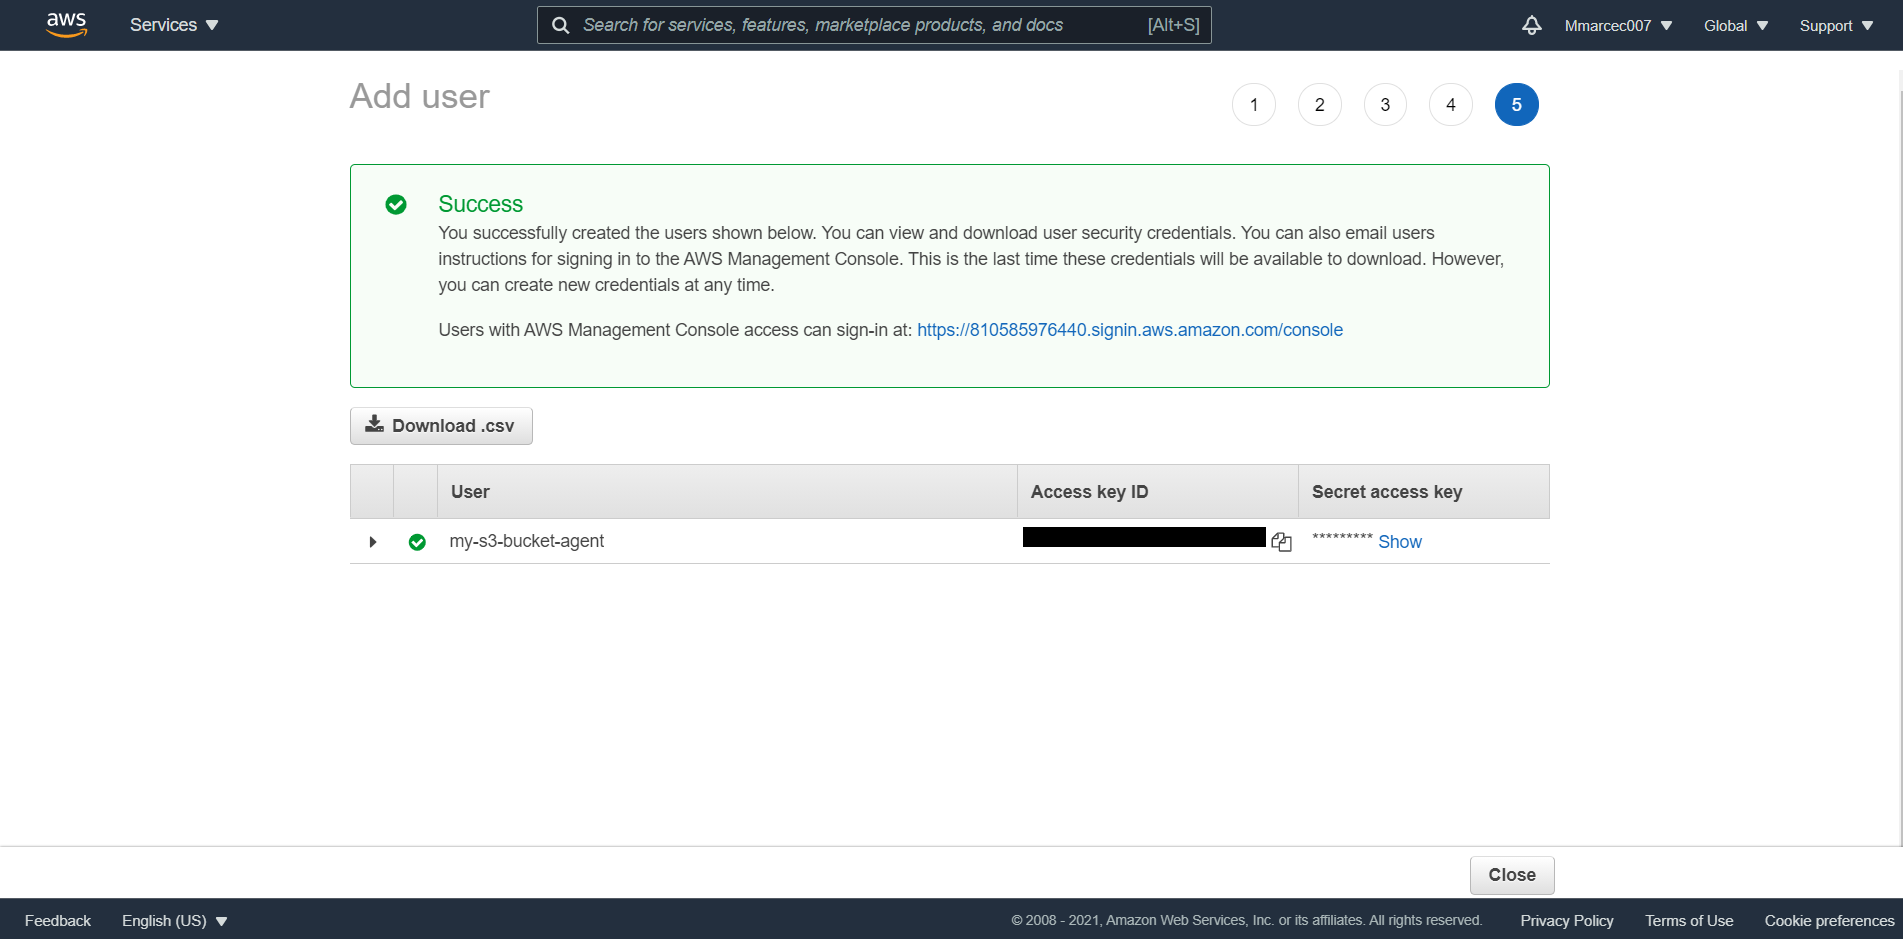
Finally, download your csv containing Access key ID and Secret access key and store it somewhere safe and hit the Close button.
Configure Offload Media Lite
In order to configure Offload Media Lite to work with Amazon S3, follow those steps here:
- Select Amazon S3 Storage Provider
- Define access keys in wp-config.php
-
define( 'AS3CF_SETTINGS', serialize( array(

'provider' => 'aws',

'access-key-id' => '********************',

'secret-access-key' => '**************************************',

) ) );
-
Then just hit Browse existing buckets or Create new bucket.

-
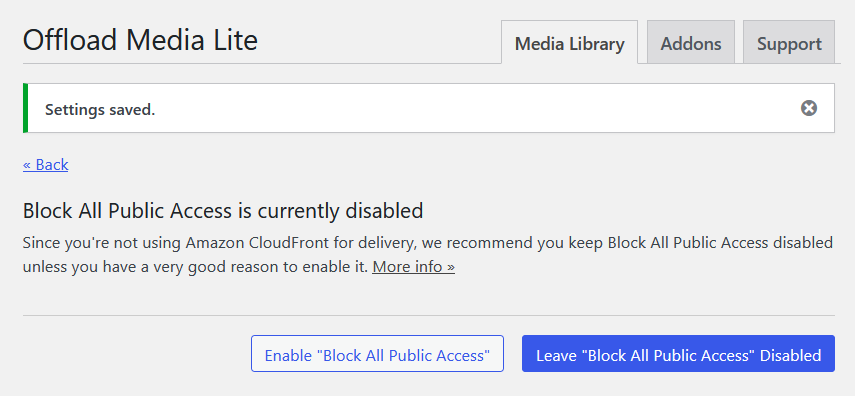
Hit the Leave “Block All Public Access” Disabled button to finish the configuration.
Review settings of your recently configured Offload Media Lite Storage and make changes if you feel that it needs to be changed.
Look what Offload Media Lite does to your WordPress installation
After the configuration is finished, just upload some media to your library, and the uploaded content will carry over to your selected S3 bucket. In the lite version, your content won’t be deleted and you’ll not be able to manage files for your S3 bucket. For more information, please visit the official Offload Media Documentation.
What should I change in my Searchable Player Skill on my WordPress installation?
You don’t have to do anything. Any media that was successfully offloaded to your S3 bucket, will be accessed from your S3 Bucket. Since the get_attachment_url() was modified by Offload Media Lite, you’ll get the right attachment URLs.

Related posts

A Dead Simple RAG Setup for WordPress: AI Chatbots for Small Websites
Discover how to set up a dead-simple RAG-based AI chatbot on your small WordPress website. With Convoworks, you can easily enable a chatbot that retrieves information directly from your pages, enhancing user experience with minimal setup. Perfect for small sites looking to leverage GPT-powered chat functionality in minutes!
VIEW FULL POST
How to Modify Your robots.txt to Prevent GPTBot from Crawling Your Site with Convoworks
Introduction Ensuring that your website’s content is accessed on your terms is essential. With an increasing number of web…
VIEW FULL POST