


Know your users with Alexa Account Linking (with PHP and WordPress)
Account linking enables your voice application to access user information during its execution. That way you can know your user’s name, email, is it a premium user …
There are two main types of account linking and only one can be used per a skill. It can be via Amazon, which is more convenient for end users (especially if you have in mind that Amazon announced consent by voice) and is good in cases when you expect to acquire new users from Amazon. The second type is linking users with your own WordPress installation. It is better in case when you already have your users and you just want to offer additional voice channels to them.
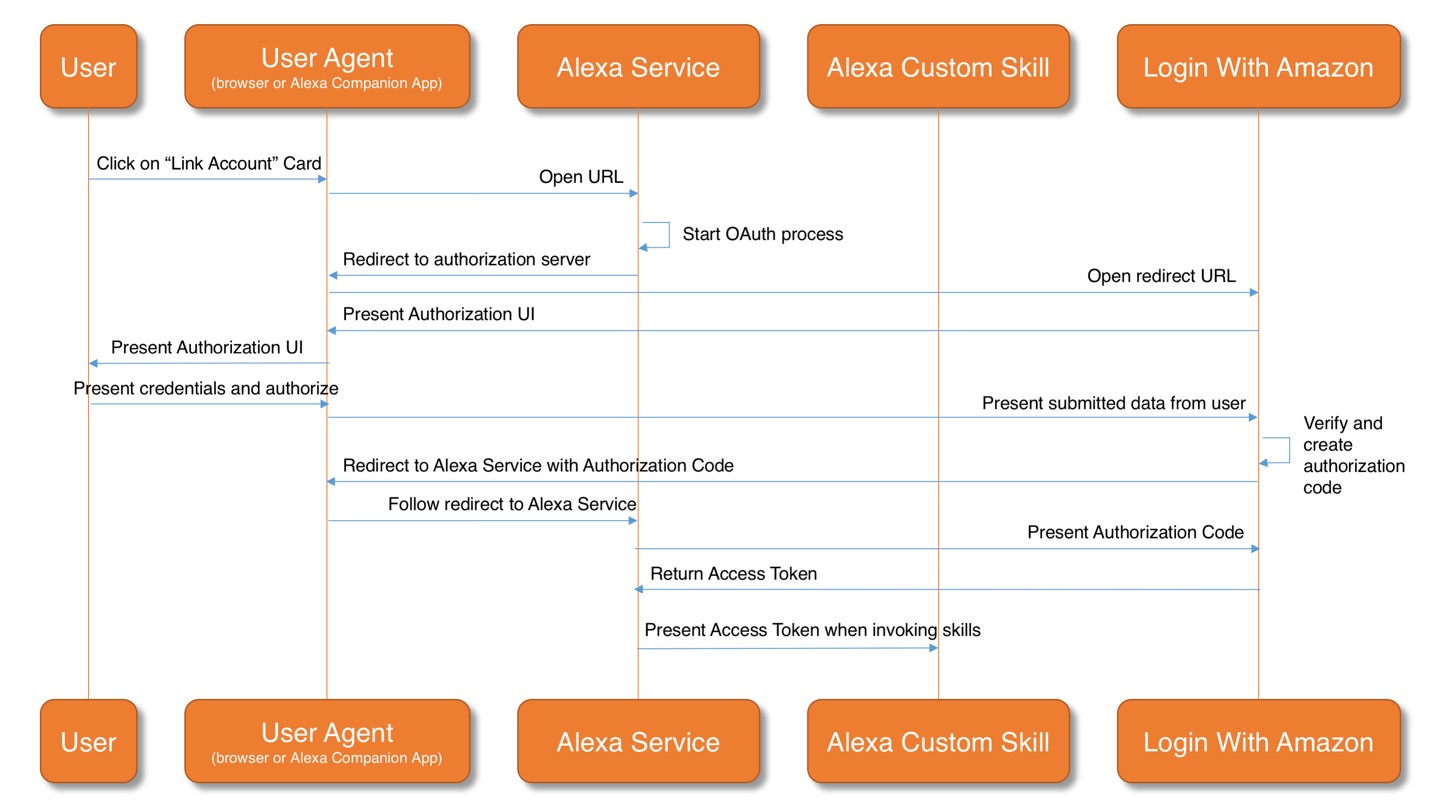
If you want to learn in more detail what account linking actually is and how does it works, check the blog post on Alexa blog.
Installation Account Linking Mode (WordPress)
Installation Account Linking mode will redirect your users to your WordPress login page where the user can enter its login credentials. Almost no configuration has to be done when using this mode. This account linking mode is the simplest, all you have to do is to leave it in the installation mode and everything will be pre-populated for you.
Example Service
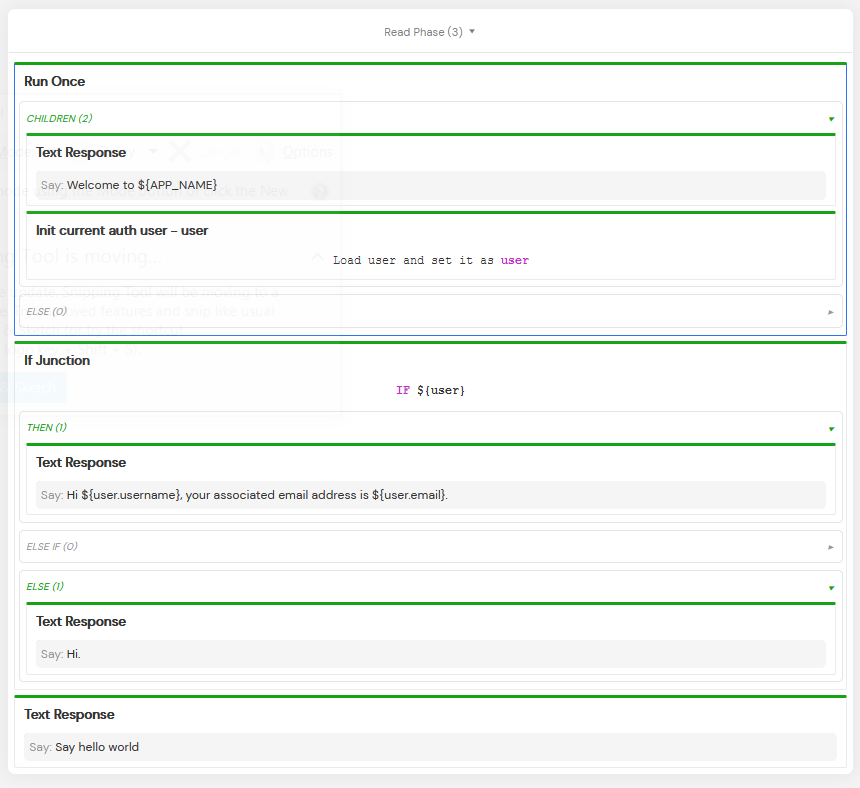
The first thing you have to do is, enable convo-wp-core package in [Workflow] and hit the [Cog] icon which will reveal the Configure packages view. After you have enabled the package, convo-wp-core package will appear on the left side. Drag and drop the Init current auth user element to your workflow. This element will expose the user as a variable in the workflow and you’ll be able to use it. Note that the Init current auth user element uses the Request scope, meaning that information is available only during that particular request. The element exposes Convo\Wp\AdminUser object. If you want to access WP_User you can do it by ${user.wpUser} or you can just load it with WP function ${get_user_by( 'email', user.email)}.
For more info on how the function get_user_by() works, please check out the WordPress Code Reference.
You can also download the example service definition below:
Amazon Account Linking Mode
Amazon account linking mode allows your users to link their Amazon account to your Alexa skill. This mode will redirect your users to the standard Amazon login page, where the user enters its login credentials. Some configuration for this mode is required and is explained below.
Configuration
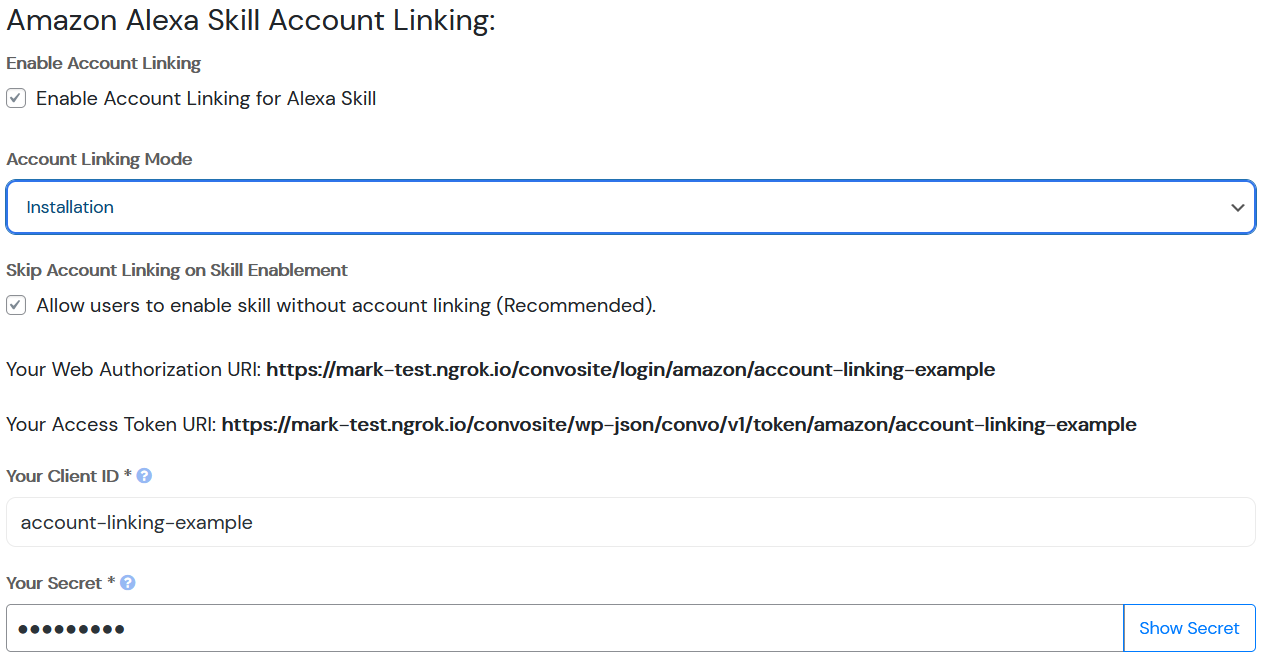
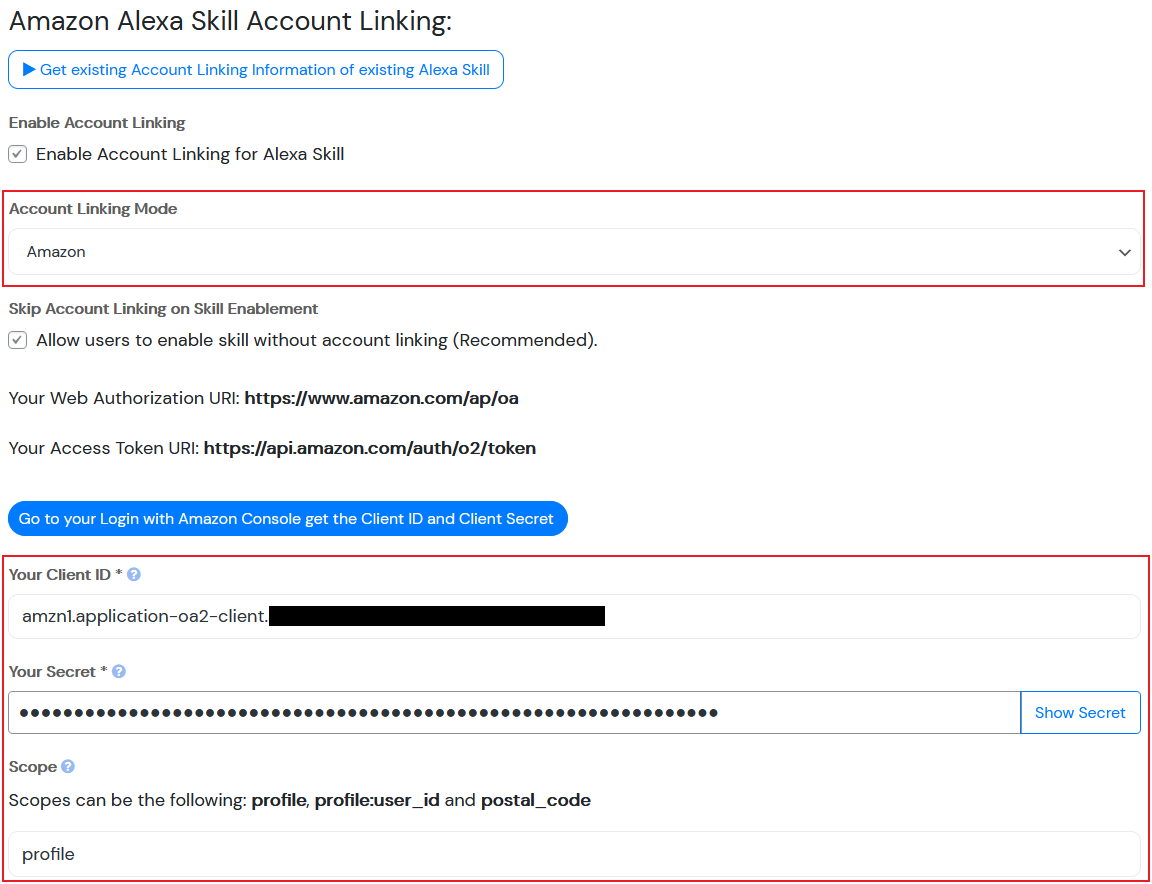
We’ll have to enter Client ID and Client Secret on Convoworks side and enter Redirect URIs on Amazon side.
Open your voice application in Convoworks and navigate to Configuration/Amazon Alexa. Enable account linking, set mode to Amazon and save. Now, in another tab, open Amazon developer console, Security Profiles and open to edit your existing security profile (you can reuse one you used to configure Convoworks). Copy Client ID and Client Secret from Amazon security profile to Convoworks configuration, set Scope to profile and save it.
After that open the skill in Alexa Skill Kit and navigate to Build/Tools/Account Linking. There are several Alexa Redirect URLs on the bottom of the page. Add them to Allowed Return URLs in your security profile and save. If you get stuck, you can find more detailed instruction in our documentation section.
Example Service
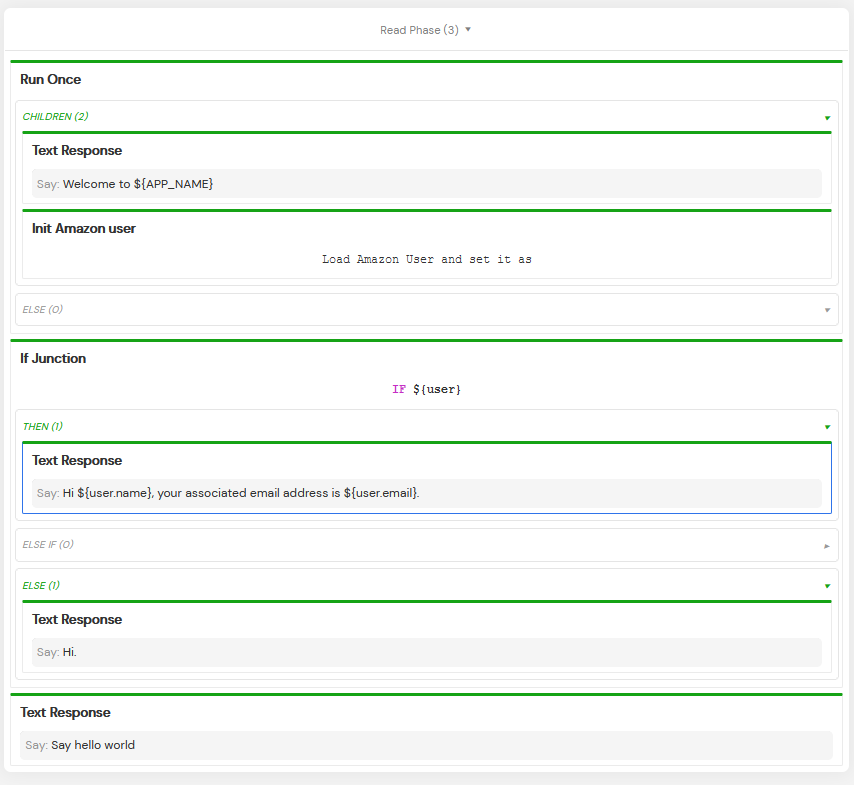
The first thing you have to do is, enable convo-alexa package in [Workflow] and hit the [Cog] which will reveal the Configure packages view. After you have enabled the package, convo-alexa package will appear on the left side. Drag and drop the Init Amazon User element to your workflow. This element will store the user as a variable and you’ll be able to use it as a session parameter across your service.
You can also download the service definition below:
That was it for the different account linking modes, let’s test this on an Alexa Device.
How to Test Account Linking with Alexa?
First you need to link your account with Alexa and then you’ll be able to see the results. You can do it with a mobile or web Alexa application.
- Link Your Account using the Alexa web app
Go to Amazon Alexa SPA -> click on [Skills] -> on the top left click on [Your Skills] -> then click on [Dev Skills] ->find your created skill -> click on [SETTINGS] and hit [Account Linking]. - Link Your Account on Alexa Mobile application
Open [Amazon Alexa] app on your Android/iOS device -> tap [More] in the menu -> then go to [Skills and Games] -> tap [Your Skills] -> scroll to [Dev] and tap [Dev] and find your created skill.
After that go to [Settings] and hit [Link Account]. Then you’ll be prompted to enter your login credentials. If everything is alright, you should see something like this:

Test it on Alexa enabled device
Just launch your skill on an Alexa enabled device by invocating your created skill and you will be able to hear your username and email. You can try it on the real device, in your Alexa mobile app or in ASK console, Test view.
Conclusion
Now when you are able to know which user is using your voice application, you are able to import their data, modify conversation flow according to their status, perform personalized queries … everything that you would usually do when creating website.

Related posts

Grow your WordPress business by acquiring the Amazon Alexa skill users
So, you have interesting content on your website that could be translated into a very voice application – e.g….
VIEW FULL POST
“Look Ma, No Hands!” WordPress Loop is running on Alexa!
The latest Convoworks WP update (0.20) includes the WP Core package (convo-wp-core), which in its very first version includes…
VIEW FULL POST